How to enable SSL on NGINX running on Amazon Linux
You have made right choice by selecting nginx as your web server! According to Netcraft nginx served or proxied 12.96% busiest sites in April 2013. Setting up nginx with OpenSSL is easy, and I will not cover it here. The goal is to enable SSL on your domain.com website, and just like anything with nginx, everything is very straight forward. I am using latest Amazon Linux in AWS with nginx/1.2.6 and php-fpm installed, and GeoTrust as digital certificate provider. GeoTrust has product called QuickSSL Premium, which takes just minutes to get your certificate, and it even comes with free trial.
For encrypted keys, use -des3 parameter. If you don't use encryption for your private ket, you should store them in a secure place. Now, both the private kay and the certificate are required to enable SSL, so keep this key file close, we will use it later to enable SSL.
The output will look something like this (I have truncated it)
I will not cover this part here, because it is very straight forward. At one point of time, you will be asked for a certificate request - copy the output of www.domain.com.csr and paste it into the text field.
Once verified and paid, you will get confirmation on your email along with your certificate.
Both blocks begin with
and end with
When copying, make sure you include both BEGIN and END boundaries.
Lets login back to our Amazon Linux, and create two additional files:
It is time to configure nginx and enable SSL.
Just a quick note on troubleshooting: Bu default, Amazon instances have port 443 closed and you cannot access it from outside. To fix this issue, you need to enable traffic from port 443 to your web server, and here's how to do it:
Step One - Generate Certificate Signing Request (CSR)
Lets generate a key pairs. In this example, I will bypass the passphrase request.1) generate private key
Log in to your Amazon linux box via SSH, and generate 2048 bit RSA private key:openssl genrsa -out www.domain.com.key 2048
For encrypted keys, use -des3 parameter. If you don't use encryption for your private ket, you should store them in a secure place. Now, both the private kay and the certificate are required to enable SSL, so keep this key file close, we will use it later to enable SSL.
2) generate the CSR
This command will prompt for the following X.509 attributes of the certificate. Make sure to use same Common Name as your domain name.
openssl req -new -key www.domain.com.key -out www.domain.com.csr
You are about to be asked to enter information that will be incorporated
into your certificate request.
What you are about to enter is what is called a Distinguished Name or a DN.
There are quite a few fields but you can leave some blank
For some fields there will be a default value,
If you enter '.', the field will be left blank.
-----
Country Name (2 letter code) [XX]:US
State or Province Name (full name) []:New York
Locality Name (eg, city) [Default City]:New York
Organization Name (eg, company) [Default Company Ltd]: My Hotel Company
Organizational Unit Name (eg, section) []:
Common Name (eg, your name or your server's hostname) []:www.domain.com
Email Address []:

Please enter the following 'extra' attributes
to be sent with your certificate request
A challenge password []:
An optional company name []:
To copy the output of the CSR to clip board, echo it out:
cat www.domain.com.csr
The output will look something like this (I have truncated it)
-----BEGIN CERTIFICATE REQUEST-----
MIICrzCCAZcCAQAwajELMAkGA1UEBhMCVVMxETAPBgNVBAgMCE5ldyBZb3JrMREw
DwYDVQQHDAhOZXcgWW9yazEcMBoGA1UECgwTRGVmYXVsdCBDb21wYW55IEx0ZDEX
...
...
RGUq5//kK4/zd9T+MkTMH4xKCsFRQrGB7I6FcyrkLyYapSfsOR+JBtytRbH2JV5Y
+3erFRnhd0sNXVXgde7ish+low==
-----END CERTIFICATE REQUEST-----
3) Backup your private key
Always make backup copies of your private keys and store them in a secure placeStep Two - Request Certificate
For QuickSSL Premium Enrollment, go to https://products.geotrust.com/orders/quickssl_premium.do?ref=GeoTrustUSI will not cover this part here, because it is very straight forward. At one point of time, you will be asked for a certificate request - copy the output of www.domain.com.csr and paste it into the text field.
Once verified and paid, you will get confirmation on your email along with your certificate.
Step Three - Create Certificate Files on your Server
In your email, you should have received Web Server Certificate and Intermediate CA.Both blocks begin with
-----BEGIN CERTIFICATE-----
and end with
-----END CERTIFICATE-----
When copying, make sure you include both BEGIN and END boundaries.
Lets login back to our Amazon Linux, and create two additional files:
1) create file intermediate.crt
Copy and paste whole Intermediate CA block to this file, and save it.2) create file www.domain.com.crt
Copy and paste Web Server Certificate block from email to this file, and again save it.3) Concatenate the SSL certificate and intermediate certificate.
cat intermediate.crt >> www.domain.com.crt
4) Copy your key and SSL certificate to /etc/ssl
At this point you should have two files:/etc/ssl/www.domain.com.crt /etc/ssl/www.domain.com.key
It is time to configure nginx and enable SSL.
Step Four - Enable and configure SSL on nginx
Open the nginx configuration file, and create new server section. I am using default.conf as example, your configuration and setup may vary.
sudo vim /etc/nginx/conf.d/default.conf
Enable SSL quickly in 5 lines. I am using .domain.com as server_name directive which will match both https://www.domain.com and https://domain.com work. GeoTrust QuickSSL Premium includes up to 4 subdomains, and by default covers domain name with and without www.
#default.conf

server {

        listen 443 default ssl;
        server_name .domain.com;
        ssl_certificate      /etc/ssl/www.domain.com.crt;
        ssl_certificate_key  /etc/ssl/www.domain.com.key;
 keepalive_timeout    70;
        # other configuration
 ...
}
Test your configuration:
If configuration was correct, restart nginx:
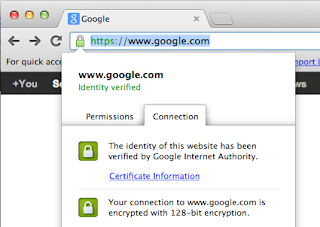
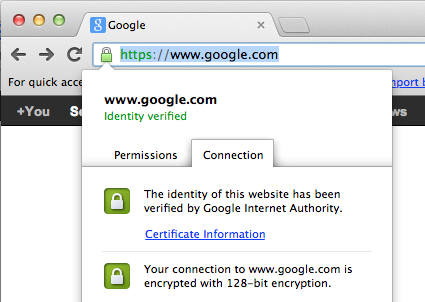
Now test your connection. Either type your domain name with https:// in your browser, or type curl command to test it:
The output would look something like this:
sudo service nginx configtest
nginx: the configuration file /etc/nginx/nginx.conf syntax is ok
nginx: configuration file /etc/nginx/nginx.conf test is successful
If configuration was correct, restart nginx:
sudo service nginx restart
Now test your connection. Either type your domain name with https:// in your browser, or type curl command to test it:
curl -v https://www.domain.com/
The output would look something like this:
* About to connect() to www.domain.com port 443 (#0)
*   Trying 11.22.33.44...
* connected
* Connected to www.domain.com (11.22.33.44) port 443 (#0)
* Initializing NSS with certpath: sql:/etc/pki/nssdb
*   CAfile: /etc/pki/tls/certs/ca-bundle.crt
  CApath: none
* SSL connection using TLS_DHE_RSA_WITH_AES_256_CBC_SHA
* Server certificate:
*  subject: CN=www.comain.com,OU=Domain Control Validated - QuickSSL(R) ...
*  start date: Apr 21 23:34:13 2013 GMT
*  expire date: Apr 25 17:06:21 2014 GMT
*  common name: www.domain.com
*  issuer: CN=GeoTrust DV SSL CA,OU=Domain Validated SSL,O=GeoTrust Inc.,C=US
> GET / HTTP/1.1
Congratulations, your web site is now SSL-enabled!
Just a quick note on troubleshooting: Bu default, Amazon instances have port 443 closed and you cannot access it from outside. To fix this issue, you need to enable traffic from port 443 to your web server, and here's how to do it:
- Log in to AWS Management Console
- Go to EC2, Security Groups
- Find the security group where your instance belongs, e.g. default
- Select it, go to Inbound tab
- Create new rule, choose HTTPS from drop down
- Press Add Rule button
- Press Apply Changes


Comments
Post a Comment